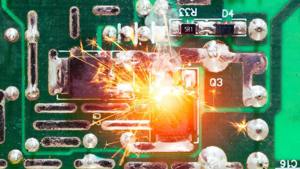
Diagnosing Laptop Motherboard Short Circuit Issues
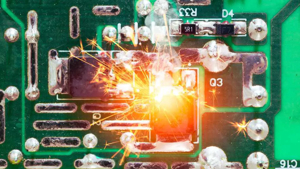
Image 1: Laptop motherboard showing signs of short circuit damage.
Quick Summary
A short circuit on a laptop motherboard happens when an unintended path allows electricity to flow where it should not. This can cause the laptop to not power on, smell like burning, or shut down randomly. Diagnosing a short requires a multimeter, visual inspection, and systematic testing of power rails and components.
This guide is for users with basic electronics knowledge. If your laptop is still under warranty, contact the manufacturer instead of opening it. Short circuit diagnosis and repair at a professional shop typically costs $75 to $200.
What Is a Motherboard Short Circuit?
A short circuit occurs when two points on the motherboard that should not be electrically connected become connected, allowing current to flow unrestricted. This can happen due to a failed capacitor, a damaged IC chip, liquid damage, or physical damage to the board.
When a short circuit occurs, the motherboard’s power delivery system shuts down to protect itself. This is why a shorted laptop usually shows no signs of life — no power LED, no fan, no response when pressing the power button.
Common Symptoms of a Short Circuit
Before testing, confirm that the symptoms match a short circuit. The following signs strongly indicate a motherboard short:
- Laptop will not turn on: No power LED, no fan, no response at all.
- Burning smell: A burnt odor coming from the laptop, especially near the vents.
- Charging LED blinks and stops: The charging light flashes briefly when plugged in, then turns off.
- Visible burn marks: Dark or burnt spots on the motherboard or components.
- Laptop shuts down randomly: Works for a while, then suddenly powers off without warning.
- Hot spot on the motherboard: A specific area of the board feels unusually hot when powered.
- Charger gets very hot: The charger tip or adapter overheats quickly when plugged in.
Common Causes of Short Circuits
- Liquid damage: Water, coffee, or soda creates conductive paths between components.
- Failed capacitors: Shorted or blown capacitors are the most common cause on laptop boards.
- Damaged MOSFET or IC: Power delivery chips can short internally when overloaded.
- Physical damage: Dropping the laptop can crack solder joints or cause internal bridges.
- Power surge: A voltage spike from a faulty charger or lightning can short power ICs.
- Corrosion: Long-term moisture causes corrosion that creates conductive paths.
- Screw or metal debris: A loose screw inside the laptop case can bridge two contacts.
Tools You Need
- Digital multimeter with continuity and resistance modes
- Small Phillips screwdriver (PH0 or PH1)
- Plastic pry tool for opening the laptop case
- Magnifying glass or jeweler’s loupe for visual inspection
- Isopropyl alcohol (90% or higher) for cleaning
- Soft brush for removing dust and corrosion
- Thermal camera or freeze spray (for advanced short location)
- Anti-static wrist strap to prevent ESD damage
Step 1: Visual Inspection
Before using any tools, inspect the motherboard carefully for visible signs of damage. Many short circuits leave physical evidence.
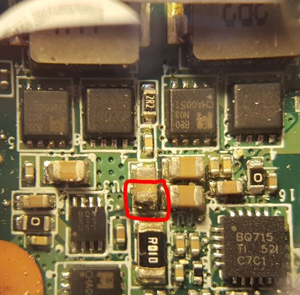
Image 2: Burnt capacitor on a laptop motherboard causing a short circuit.
- Open the laptop and remove the motherboard completely.
- Use a magnifying glass to inspect all areas of the board.
- Look for burnt or blackened areas on the PCB.
- Check all capacitors for bulging, leaking, or burn marks.
- Look for corrosion or white/green residue (signs of liquid damage).
- Check for cracked or missing components.
- Inspect solder joints for cracks or bridges.
If you find a visibly burnt component, that is likely the source of the short. Note its location and proceed to test with a multimeter to confirm.
Step 2: Test for Short with a Multimeter
A multimeter can confirm if a short circuit exists and help you locate it. The test checks whether the power rails on the motherboard have near-zero resistance to ground, which indicates a short.
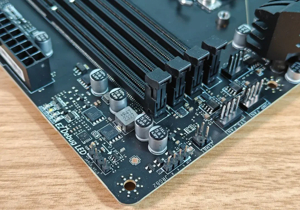
Image 3: Using a multimeter to test motherboard power rails for short circuits.
Continuity Mode Test
- Set the multimeter to continuity mode (the beep symbol).
- Place the black probe on a ground point (a metal mounting hole or heatsink screw hole).
- Place the red probe on the input power pad (where the charger DC jack connects).
- If the multimeter beeps continuously, there is a short circuit on the main power rail.
- If there is no beep, test other power rails the same way.
Resistance Mode Test
- Set the multimeter to resistance mode (ohms).
- Place the black probe on ground.
- Place the red probe on the power input pad or inductor output.
- Normal resistance should be above 100 ohms.
- If resistance reads near 0 ohms, there is a dead short on that rail.
- Test each power rail one by one to narrow down the shorted section.
Black probe → Ground (mounting hole)
Red probe → Power input pad
BEEP = Short circuit on this rail
Important: Always test with the laptop fully disconnected from power and the battery removed. Never test a powered-on motherboard with a multimeter in continuity or resistance mode — this can damage both the multimeter and the board.
Step 3: Locate the Shorted Component
Once you confirm a short on a specific power rail, you need to find the exact component causing it. There are several methods.
Method A: Visual + Touch Test
- Plug in the charger (with motherboard exposed but not in the case).
- Quickly touch different areas of the board with your finger.
- A shorted component will heat up very quickly.
- Unplug immediately after finding the hot spot.
Method B: Freeze Spray Method
- Apply freeze spray or compressed air (upside down) to the entire board.
- Plug in the charger.
- The shorted component will melt the frost fastest because it heats up rapidly.
- Unplug and note the location of the melted spot.
Method C: Thermal Camera
If you have access to a thermal camera, it is the most reliable method. Power the board and the thermal camera will immediately show the hot spot caused by the shorted component.
Method D: Component-by-Component Testing
- Set multimeter to resistance mode.
- Place the black probe on ground.
- Touch the red probe to each capacitor pad on the shorted rail.
- The capacitor with the lowest resistance to ground is closest to the short.
- Remove that capacitor and test again.
- If the short disappears, that capacitor was the culprit.
Step 4: Check Common Suspect Components
Some components fail more often than others. If you cannot locate the exact short, check these first:
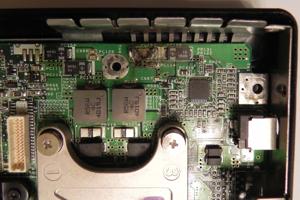
Image 4: Blown power capacitor that caused a short on the motherboard.
- Input capacitors: Located near the DC jack. These take the most power stress.
- MOSFETs: Power delivery transistors near the CPU and GPU voltage regulators.
- DC jack area: Check for liquid damage near the charging port.
- USB port controllers: Shorted USB data lines can cause board-level shorts.
- Audio IC: A common failure point on older laptops.
- BIOS chip area: Corrosion near the BIOS chip can cause shorts.
Step 5: Repair or Replace the Shorted Component
Once you have identified the shorted component, you need to replace it. This requires soldering skills.
- Use a hot air rework station to remove the shorted component.
- Clean the pads with solder wick and flux.
- Find a replacement component with the same specifications.
- Solder the new component onto the board.
- Clean the area with isopropyl alcohol.
- Re-test the power rail with the multimeter.
- If the short is gone, reassemble and test the laptop.
Remove with hot air station
Clean pads with solder wick
Solder replacement component
Clean with isopropyl alcohol
Re-test with multimeter
Reassemble and test
Warning: SMD component replacement requires a hot air rework station and experience. A regular soldering iron is not sufficient for most laptop motherboard components. If you do not have the right tools or experience, take the laptop to a professional repair shop.
Step 6: Clean Liquid Damage
If the short was caused by liquid damage, cleaning the board is essential even after replacing the shorted component. Corrosion can cause new shorts over time.
- Submerge or brush the affected area with isopropyl alcohol (90%+).
- Use a soft toothbrush to gently scrub corroded areas.
- Pay special attention to capacitors, IC pins, and connectors.
- Let the board dry completely for 1 to 2 hours.
- Inspect under magnification for remaining corrosion.
- Repeat cleaning if necessary.
How to Prevent Short Circuits
- Keep liquids away from the laptop at all times.
- Use a surge protector to protect against power spikes.
- Use the correct charger with the right voltage and amperage.
- Avoid dusty environments — dust can cause static buildup and overheating.
- Do not open the laptop unnecessarily — screws and debris can cause shorts.
- Clean the fan regularly to prevent overheating that damages components.
- Avoid using the laptop in high humidity — moisture causes corrosion over time.
Quick Diagnosis Flowchart
- Laptop does not power on?
- Check charger and DC jack first (rule out power supply)
- Open laptop and visually inspect motherboard
- Look for burnt spots, bulging capacitors, corrosion
- Test power rails with multimeter in continuity mode
- Locate the shorted component using heat or resistance test
- Replace the shorted component
- Clean any liquid damage with isopropyl alcohol
- Re-test with multimeter — short should be gone
- Reassemble and power on
When to Seek Professional Help
Short circuit repair is advanced work. Take the laptop to a professional if:
- You do not have a multimeter or soldering tools.
- The shorted component is a BGA IC (requires reballing).
- The motherboard has multiple layers of damage from liquid.
- You cannot locate the shorted component after testing.
- The laptop is still under warranty.
- You are not comfortable working with small SMD components.
Professional motherboard short circuit repair typically costs $75 to $200. If the motherboard damage is too extensive, a full motherboard replacement may be needed, which can cost $200 to $500 depending on the laptop model.
Useful Links
- Asdullah.com
- PCBasic: Test Circuit Board with Multimeter
- TESMEN: Test Motherboard with Multimeter
- Altium: How to Test for Short Circuit on PCB
- Swachh Gadgets: Motherboard Failure Causes
FAQ
How do I know if my motherboard has a short circuit?
The most common sign is that the laptop does not turn on at all — no power LED, no fan. A burning smell, burnt spots on the board, or a charging LED that blinks briefly also indicate a short.
Can a short circuit motherboard be fixed?
Yes, if the shorted component is identified and replaced. Common culprits like capacitors and MOSFETs are relatively cheap and replaceable with the right tools.
Can I test a short circuit with a multimeter?
Yes. Set the multimeter to continuity mode, place the black probe on ground, and the red probe on the power input. A continuous beep indicates a short circuit on that rail.
What causes most motherboard shorts?
Liquid damage is the most common cause, followed by failed capacitors, power surges, and physical damage from drops.
Is it safe to work on a motherboard myself?
Only if you have electronics repair experience, the right tools, and take anti-static precautions. If not, take it to a professional repair shop.
How much does motherboard short circuit repair cost?
Professional repair costs $75 to $200. If the board is too damaged, a full motherboard replacement costs $200 to $500.
Conclusion
Diagnosing a laptop motherboard short circuit requires patience, the right tools, and systematic testing. Start with a visual inspection for burnt spots and corrosion, then use a multimeter to confirm the short on power rails. Locate the shorted component using the heat or resistance method, and replace it with proper soldering equipment.
If the short was caused by liquid damage, cleaning the board with isopropyl alcohol is just as important as replacing the component. And if you are not comfortable with electronics repair, a professional repair shop can diagnose and fix the issue — often for less than the cost of a replacement motherboard.
