How to Fix Laptop Charging Port/DC Jack Problems
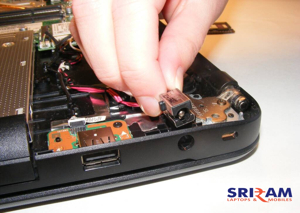
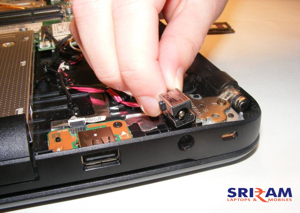
Image 1: Laptop DC power jack being repaired and replaced.
Quick Summary
If your laptop is not charging, the charging port (also called the DC jack or power connector) may be damaged, loose, or dirty. Common symptoms include the charger falling out easily, the charging light flickering, or the battery showing “plugged in, not charging.”
Start by testing the charger and battery first. If those are fine, the DC jack is likely the problem. Some DC jacks are replaceable modules, while others are soldered directly to the motherboard and require soldering skills.
Common Symptoms of a Bad DC Jack
Before you start repairing, confirm that the charging port is actually the problem. Here are the most common signs:
- Loose charger fit: The charger plug wiggles or falls out easily.
- Charging light flickers: The charging LED blinks on and off when you move the plug.
- Plugged in, not charging: Windows shows the charger connected but battery is not charging.
- Only charges at certain angles: You have to hold the charger at a specific angle for it to work.
- Laptop only runs on battery: The laptop works on battery but dies when the battery runs out.
- Burning smell or visible damage: The port looks burnt, melted, or has bent pins.
What You Need
- Replacement DC jack matching your laptop model
- Small Phillips screwdriver (PH0 or PH1)
- Plastic pry tool for opening the laptop case
- Soldering iron (if the jack is soldered to the motherboard)
- Solder wick and solder (for desoldering)
- Multimeter (for testing power)
- Small tray for screws
- Anti-static wrist strap (recommended)
Step 1: Rule Out the Charger First
Before opening the laptop, confirm the charger itself is not the problem. A faulty charger can mimic DC jack symptoms.
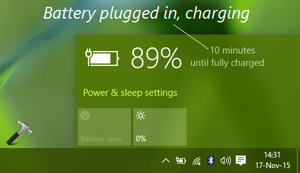
Image 2: Windows showing “plugged in, not charging” error on the battery.
- Try a different charger with the same voltage and connector size.
- Test your charger on another compatible laptop if possible.
- Check the charger tip for bent pins or damage.
- Inspect the charger cable for cuts or frayed wires near the plug.
If a different charger works, your original charger is the problem — not the DC jack. If a known-good charger also does not charge, the DC jack is likely faulty.
Step 2: Test the DC Jack with a Multimeter
If you have a multimeter, you can test whether the DC jack is receiving and passing power correctly before disassembling the laptop.
- Plug in the charger.
- Set the multimeter to DC voltage mode (20V range).
- Place the red probe on the center pin of the DC jack.
- Place the black probe on the outer barrel or ground.
- Check the reading — it should match the charger’s output voltage (usually 19V to 20V).
If the multimeter reads 0V or the voltage fluctuates when you wiggle the plug, the DC jack is damaged and needs replacement.
Safety: Do not short the two probes together while testing. Do not touch bare wires while the charger is plugged in.
Step 3: Disassemble the Laptop
To access the DC jack, you need to open the laptop case and reach the motherboard.
- Shut down the laptop and unplug the charger.
- Remove the battery if it is removable.
- Place the laptop upside down on a soft cloth.
- Remove all screws on the bottom panel. Some may be hidden under rubber feet.
- Use a plastic pry tool to carefully unclip the bottom cover.
- Remove any internal frames or shields covering the motherboard.
- Locate the DC jack — it is usually near the charging port on the edge of the motherboard.
Take photos as you disassemble so you know where each screw and cable goes during reassembly.
Step 4: Identify Your DC Jack Type
There are two main types of laptop DC jacks. The repair method depends on which type your laptop uses.
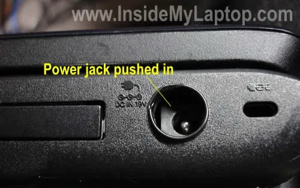
Image 3: Damaged laptop DC power jack showing broken solder joints.
- Wire-connected jack: The DC jack is a separate module connected to the motherboard by a cable with a small connector plug. This is the easiest to replace — just unplug and swap.
- Soldered jack: The DC jack is soldered directly to the motherboard. This requires desoldering and resoldering, which needs a soldering iron and soldering skills.
Step 5A: Replace a Wire-Connected DC Jack
If your DC jack connects to the motherboard with a cable, replacement is straightforward.
- Unplug the DC jack cable connector from the motherboard.
- Remove any screws holding the jack in place.
- Push the old jack out from the side of the laptop case.
- Insert the new replacement jack into the same slot.
- Screw it in place if it uses screws.
- Plug the cable connector back into the motherboard.
Make sure the connector is fully seated and oriented the correct way.
Step 5B: Replace a Soldered DC Jack
If the jack is soldered to the motherboard, you need to desolder the old one and solder the new one. This requires soldering experience.
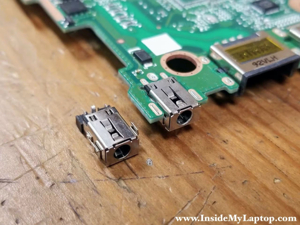
Image 4: Soldered DC jack on the motherboard being removed for replacement.
- Plug in your soldering iron and let it heat up.
- Apply solder wick to the old solder joints on the DC jack pins.
- Touch the iron to the wick to melt and absorb the old solder.
- Repeat for all pins until the jack is free.
- Gently pull the old jack off the motherboard.
- Clean the pads with solder wick to remove leftover solder.
- Insert the new DC jack into the same position.
- Solder each pin carefully — apply heat to the pad, then feed solder.
- Check for solder bridges between pins.
- Let it cool, then test with a multimeter.
Apply solder wick to old joints
Melt and absorb old solder
Remove old jack
Clean pads
Insert new jack
Solder each pin
Check for bridges
Test with multimeter
Warning: If you have never soldered before, do not attempt this on your laptop motherboard. A bad solder joint can permanently damage the motherboard. Take it to a professional repair shop instead.
Step 6: Reassemble and Test
After replacing the DC jack, put the laptop back together and test if it charges.
- Reassemble the laptop in reverse order — replace internal shields, then the bottom cover.
- Screw all screws back into their original positions.
- Reinsert the battery if it was removed.
- Plug in the charger.
- Check if the charging LED turns on.
- Power on the laptop.
- Check the battery icon in Windows — it should show “charging.”
If the laptop charges normally, the repair is successful. If it still does not charge, double-check the solder joints or cable connection, and test with a multimeter again.
Common Causes of DC Jack Failure
- Repeated bending: Yanking or bending the charger plug over time breaks the jack.
- Dropping the laptop while plugged in: A fall can break the jack off the motherboard.
- Wear and tear: Inserting and removing the charger thousands of times wears out the jack.
- Dust and debris: Dirt inside the port can prevent proper contact.
- Broken solder joints: Heat and vibration can crack solder connections over time.
- Using the wrong charger: A charger with the wrong plug size can damage the jack.
How to Prevent DC Jack Damage
- Do not bend the charger cable sharply near the plug.
- Unplug the charger by holding the plug, not by pulling the cable.
- Keep the laptop on a flat surface so the charger is not stressed at an angle.
- Clean the charging port occasionally with compressed air.
- Use the correct charger with the right plug size and voltage.
- Avoid moving the laptop while charging if possible.
When to Seek Professional Help
Some situations are best left to a professional repair technician:
- The jack is soldered to the motherboard and you have no soldering experience.
- The motherboard pads are damaged or lifted — this requires advanced repair.
- The laptop is still under warranty — opening it may void the warranty.
- The charging port is integrated with a USB-C port on modern thin laptops.
- You are not comfortable disassembling electronics.
A professional DC jack replacement typically costs $50 to $150 depending on the laptop model and whether soldering is required.
Useful Links
- Asdullah.com
- Inside My Laptop: DC Jack Replacement
- Hackaday: Fixing Broken Laptop Power Jack
- iFixit Repair Guides
- Computers Plus: DC Jack Repair
FAQ
How do I know if my DC jack is broken?
If the charger only works at certain angles, the charging light flickers, or the laptop shows “plugged in, not charging,” the DC jack is likely faulty.
Can I fix a DC jack myself?
If it is a wire-connected jack, yes — it is a simple plug-and-swap replacement. If it is soldered, you need soldering skills.
How much does DC jack repair cost?
Professional repair typically costs $50 to $150. Doing it yourself costs only $5 to $15 for the replacement jack.
Can a bad DC jack damage the motherboard?
Yes. A shorted or burnt DC jack can send power to the wrong circuit and damage the motherboard. Fix it as soon as possible.
Why does my charger only work at certain angles?
The internal contacts of the DC jack are worn or the solder joints are cracked. The jack needs to be replaced.
Can I use a different charger to test?
Yes, but only use a charger with the same voltage, amperage, and connector size. Using the wrong charger can damage the laptop.
Conclusion
A broken laptop charging port is a common hardware problem, but it is usually fixable. First, rule out the charger and battery. Then test the DC jack with a multimeter to confirm it is the culprit.
If your laptop has a wire-connected jack, replacement is easy and takes about 20 minutes. If the jack is soldered to the motherboard, you need soldering experience — or take it to a professional repair shop. Either way, fix it promptly to avoid further damage to the motherboard.
